Netty(二)之 Protobuf
Netty 框架中已经默认支持了 Protobuf 格式的数据传输,因此我们本节就来学习 Protobuf,Protobuf 主要用于进行 RPC 数据传输(它是一种自定义协议,这种协议能更好,更小体积,对数据编解码【序列号和反序列化的过程】),在学习 Protobuf 之前我们先了解两个概念 RMI 和 RPC
RMI:Remote Method Invocation,用于跨机器方法调用,只针对于 Java(要求调用者和被调用者都必须是 Java 程序)
- client:stub(装)
- server:skeleton(骨架)
client 与 server 底层通过 socket 数据传输
RPC:Remote Procedure Call,远程过程调用,原理和 RMI 一致,优势在于跨语言支持
那对于 RMI 和 RPC 编写的具体步骤如下:
- 定义接口说明文件(IDL:Interface Description Language ):描述对象(结构体),对象成员,接口方法等一系列信息
- 通过 RPC 框架所提供的编译器,将说明文件编译成具体语言文件
- 在客户端与服务器端分别引入 RPC 编译器所生产的文件,即可享调用本地方法一样调用远程方法
序列化与反序列化
序列化与反序列化也叫做,编码与解码
序列化:将对象转换成字节,这个过程是encode
反序列化:将字节翻译成对象,这个过程是decode
Protobuf
- 官方网站:Protocol Buffers
- 官方指南:Guide
- 官方说明:Protocol buffers are a language-neutral, platform-neutral extensible mechanism for serializing structured data.(Protocol buffers 是一种语言中立,平台中立,可扩展的一种机制用于序列化结构化的数据)
Protobuf 编译环境搭建
- 下载对应系统的编译器,格式如
protoc-$VERSION-$PLATFORM.zip,这里下载的是protoc-3.11.0-osx-x86_64.zip - 为了使用方便,我们需要将 protoc 解压的路径添加到环境变量中
- 在终端中使用
protoc -h命令验证 protoc 变量是否配置正确
Protobuf 特定语言
这是一步可选步骤,根据自身需要,选择需要的语言编译文件,这里下载的是 protobuf-java-3.11.0.zip,用于学习了解 protoc 对 Java 编译的支持原理等
Protobuf 使用
在官方 README 介绍中,请查看Protobuf Runtime Installation说明,这里介绍了在使用不同语言时需要安装的一些依赖,比如这里查看 Java,在需要使用的项目中引入相关的依赖
简单使用
- 编写
.proto文件1
2
3
4
5
6
7
8
9
10
11
12
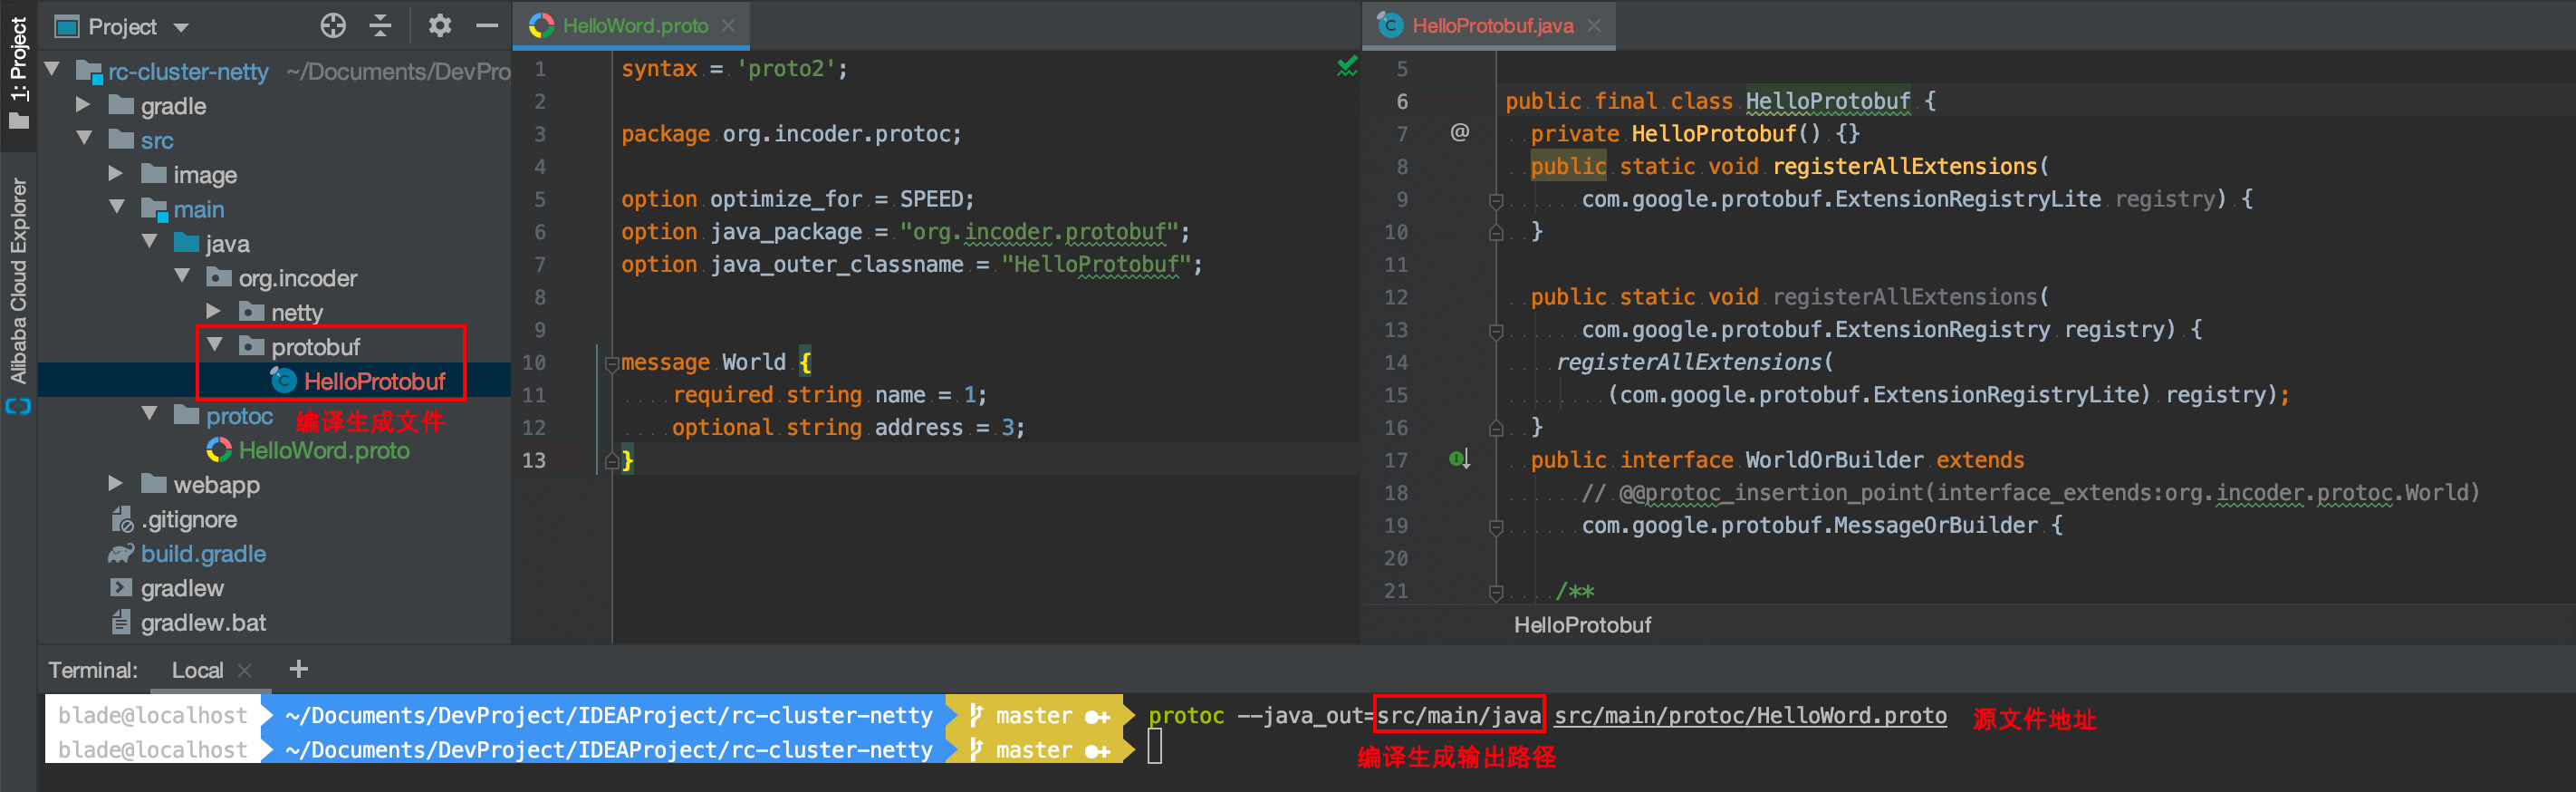
13syntax = 'proto2';
package org.incoder.protoc;
option optimize_for = SPEED;
option java_package = "org.incoder.protobuf";
option java_outer_classname = "HelloProtobuf";
message World {
required string name = 1;
optional string address = 3;
} - 执行编译命令,
protoc --java_out=$DST_DIR $SRC_DIR/FILE_NAME.proto - 编写简单的测试,明白 RPC 的过程
1
2
3
4
5
6
7
8
9
10
11
12
13
14
15
16
17
18
19public static void main(String[] args) throws InvalidProtocolBufferException {
///////////////////////////////////////////////////////////////////////////
// 把下面的这个过程等同到 RPC 的过程
///////////////////////////////////////////////////////////////////////////
// A机器上构建了World对象
HelloProtobuf.World world = HelloProtobuf.World.newBuilder()
.setName("China")
.setAddress("处于地球东半球")
.build();
// A 机器构建的对象转换成字节数组
// 字节数组通过网络传输(Netty 等方式) A 机器传输到 B 机器
byte[] world2ByteArray = world.toByteArray();
// B 机器上把字节数转换成对象(取决于在 B 机器上的使用语言),并把数据打印出来
HelloProtobuf.World worlds = HelloProtobuf.World.parseFrom(world2ByteArray);
System.out.println(worlds);
}
整个过程如下截图
在 Netty 中的应用(单消息)
和之前Netty初体验(一)中编写步骤一样,这里只是对Initializer 中使用Netty 提供相关 Protobuf 的工具类
- ProtobufDecoder:将收到的 ByteBuf 解码为 Google Protocol Buffers 和 MessageLite(),请注意,如果使用基于流的传输方式(比如:TCP/IP),则此解码器必须与适当的 ByteToMessageDecoder(如:ProtobufVarint32FrameDecoder 或者 ProtobufVarint32LengthFieldPrepender)
- ProtobufDecoderNano:将接收到的 ByteBuf解码为 Google Protocol Buffers MessageNano,请注意,如果使用的是基于流的传输方式(如:TCP/IP),则此解码器必须与适当的 ByteToMessageDecoder(如果:LengthFieldBasedFrameDecoder)一起使用
- ProtobufEncoder:将请求的 Google Protocol Buffers 和 MessageLite 编码为 ByteBuf
- ProtobufEncoderNano:将请求的 Google Protocol Buffers MessageNano 编码为 ByteBuf
- ProtobufVarint32FrameDecoder:解码器按消息中 Google Protocol Buffers 基于 128 Varints 整数长度字段的值动态拆分接收到的 ByteBuf
1
2
3
4
5
6
For example:
BEFORE DECODE (302 bytes) AFTER DECODE (300 bytes)
+--------+---------------+ +---------------+
| Length | Protobuf Data |----->| Protobuf Data |
| 0xAC02 | (300 bytes) | | (300 bytes) |
+--------+---------------+ +---------------+ - ProtobufVarint32LengthFieldPrepender:一种编码器,可在 Google Protocol Buffers Base 128 Varints 之前添加
1
2
3
4
5
BEFORE ENCODE (300 bytes) AFTER ENCODE (302 bytes)
+---------------+ +--------+---------------+
| Protobuf Data |-------------->| Length | Protobuf Data |
| (300 bytes) | | 0xAC02 | (300 bytes) |
+---------------+ +--------+---------------+
SingleClient
1 | public class SingleClient { |
SingleClientInitializer
1 | public class SingleClientInitializer extends ChannelInitializer<SocketChannel> { |
SingleClientHandler
1 | public class SingleClientHandler extends SimpleChannelInboundHandler<NettyDataInfo.Person> { |
SingleServer
1 | public class SingleServer { |
SingleServerInitializer
1 | public class SingleServerInitializer extends ChannelInitializer<SocketChannel> { |
SingleServerHandler
1 | public class SingleServerHandler extends SimpleChannelInboundHandler<NettyDataInfo.Person> { |
在 Netty 中的应用(多消息)
由于通过 Netty(底层是 socket)使客户端与服务端建立连接,使用 Google Protocol Buffers 协议进行数据通信,而 ProtobufDecoder(MessageLite prototype) 需要指定具体的实例,因此想要进行多消息类型数据通信,可以有两种方式
- 自定义通信协议
- 在定义 IDL 时,将所有类型的数据进行定义,最终生成一个包含了通信所需的所有类型的顶层 Message
方式二具体代码可参考:multiple
问题
环境搭建问题
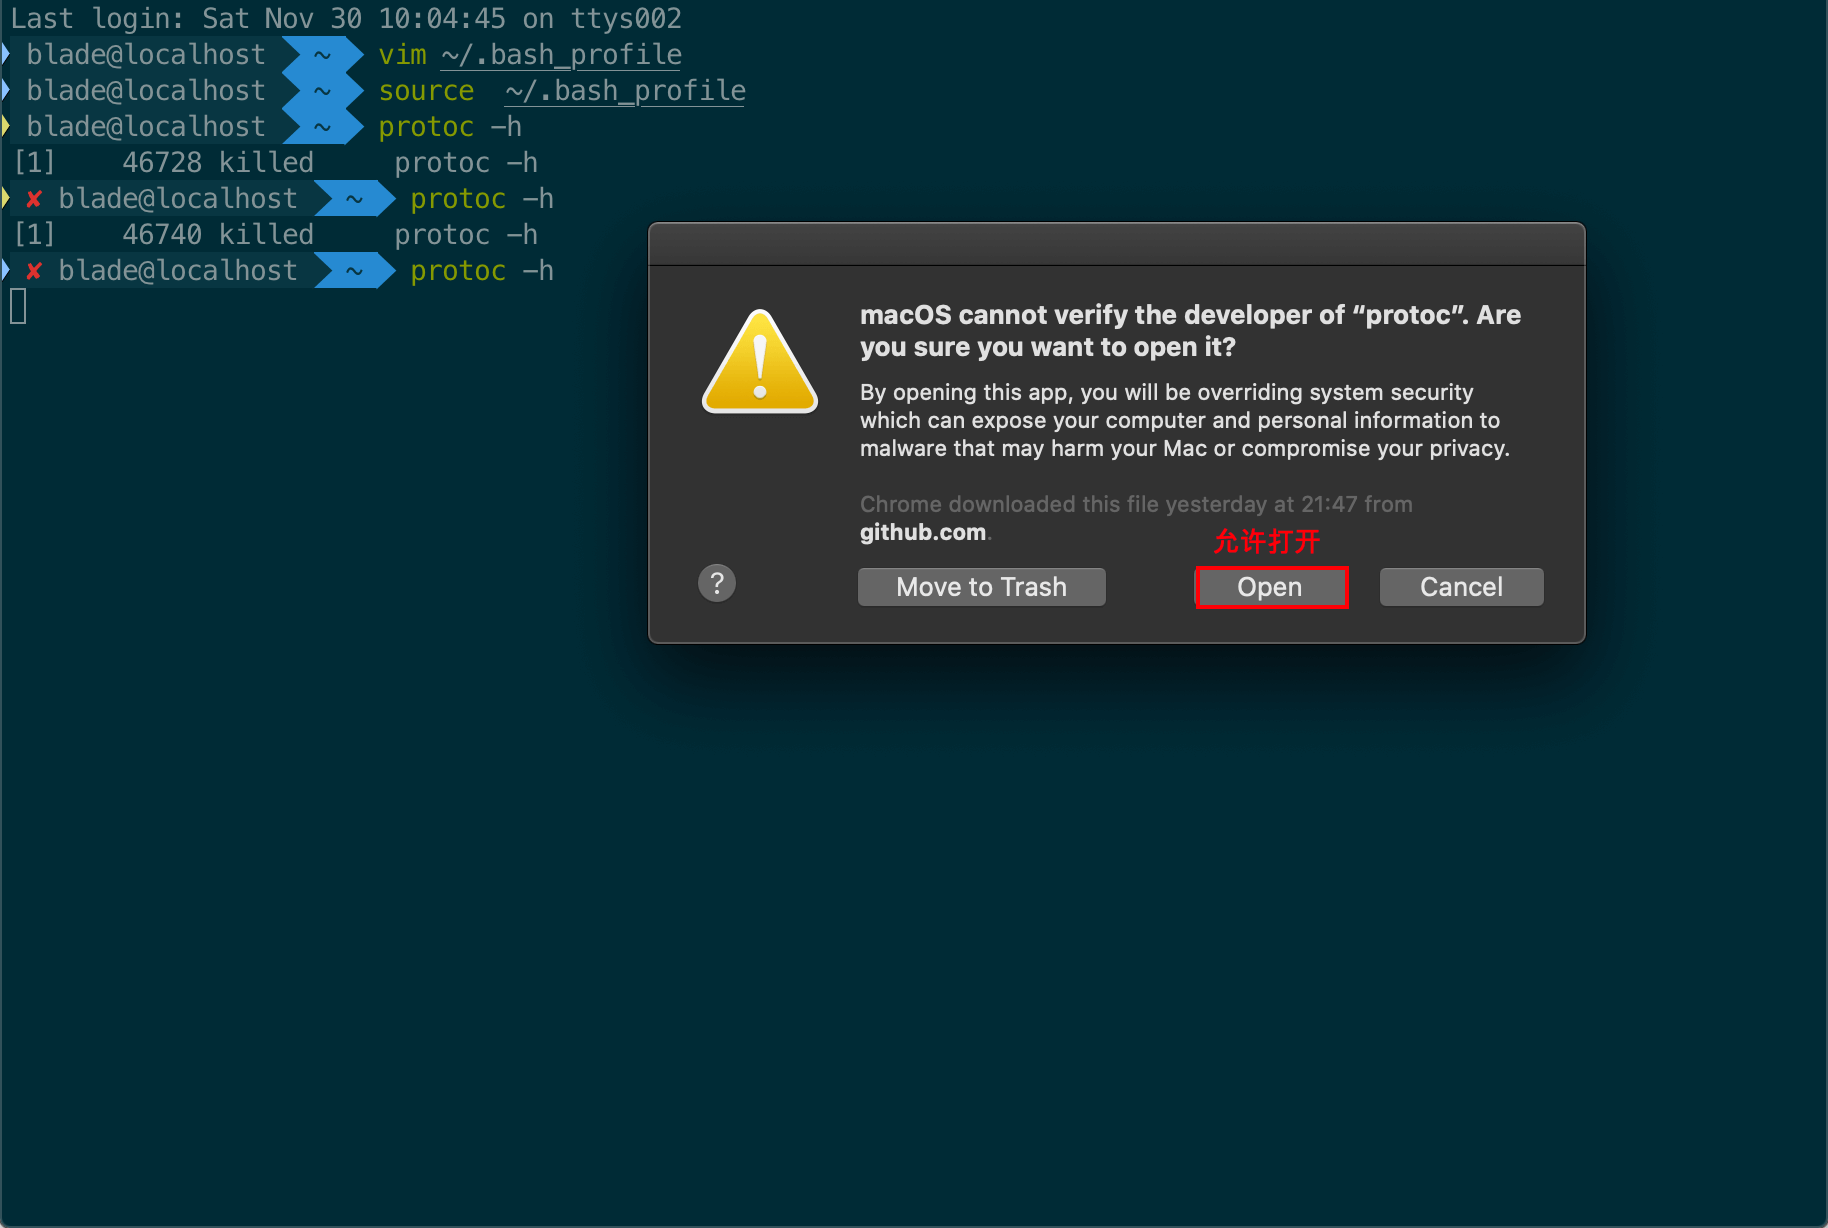
在配置好环境变量后,执行 protoc -h 命令提示 “protoc” cannot be opened because the developer cannot be verified.
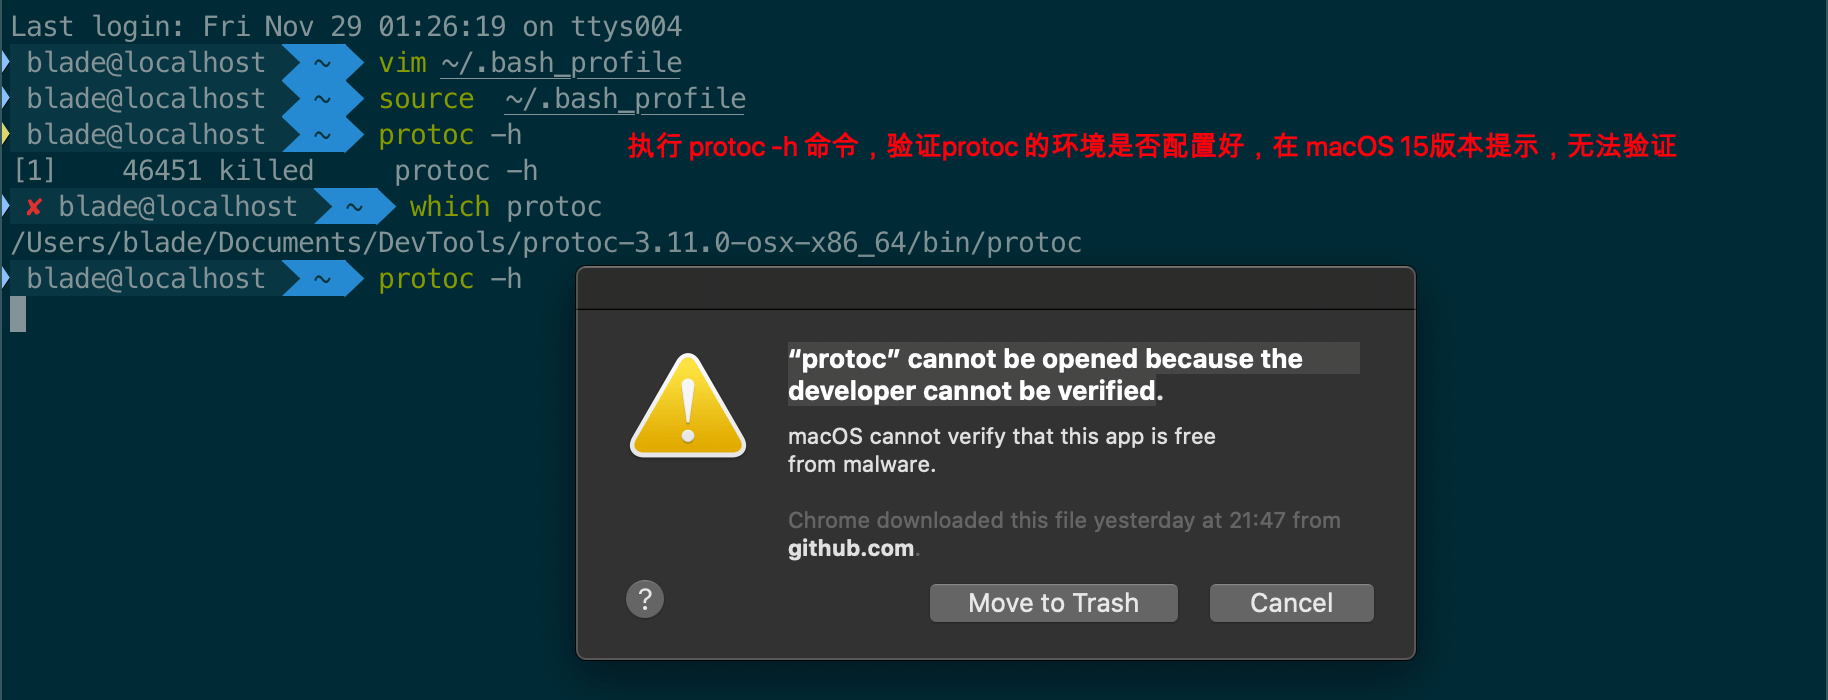
- 原因:在 macOS 10.15 版本上未授权访问
- 解决:在系统设置中,进行授权,操作如下 Settings -> Security & Privacy -> General
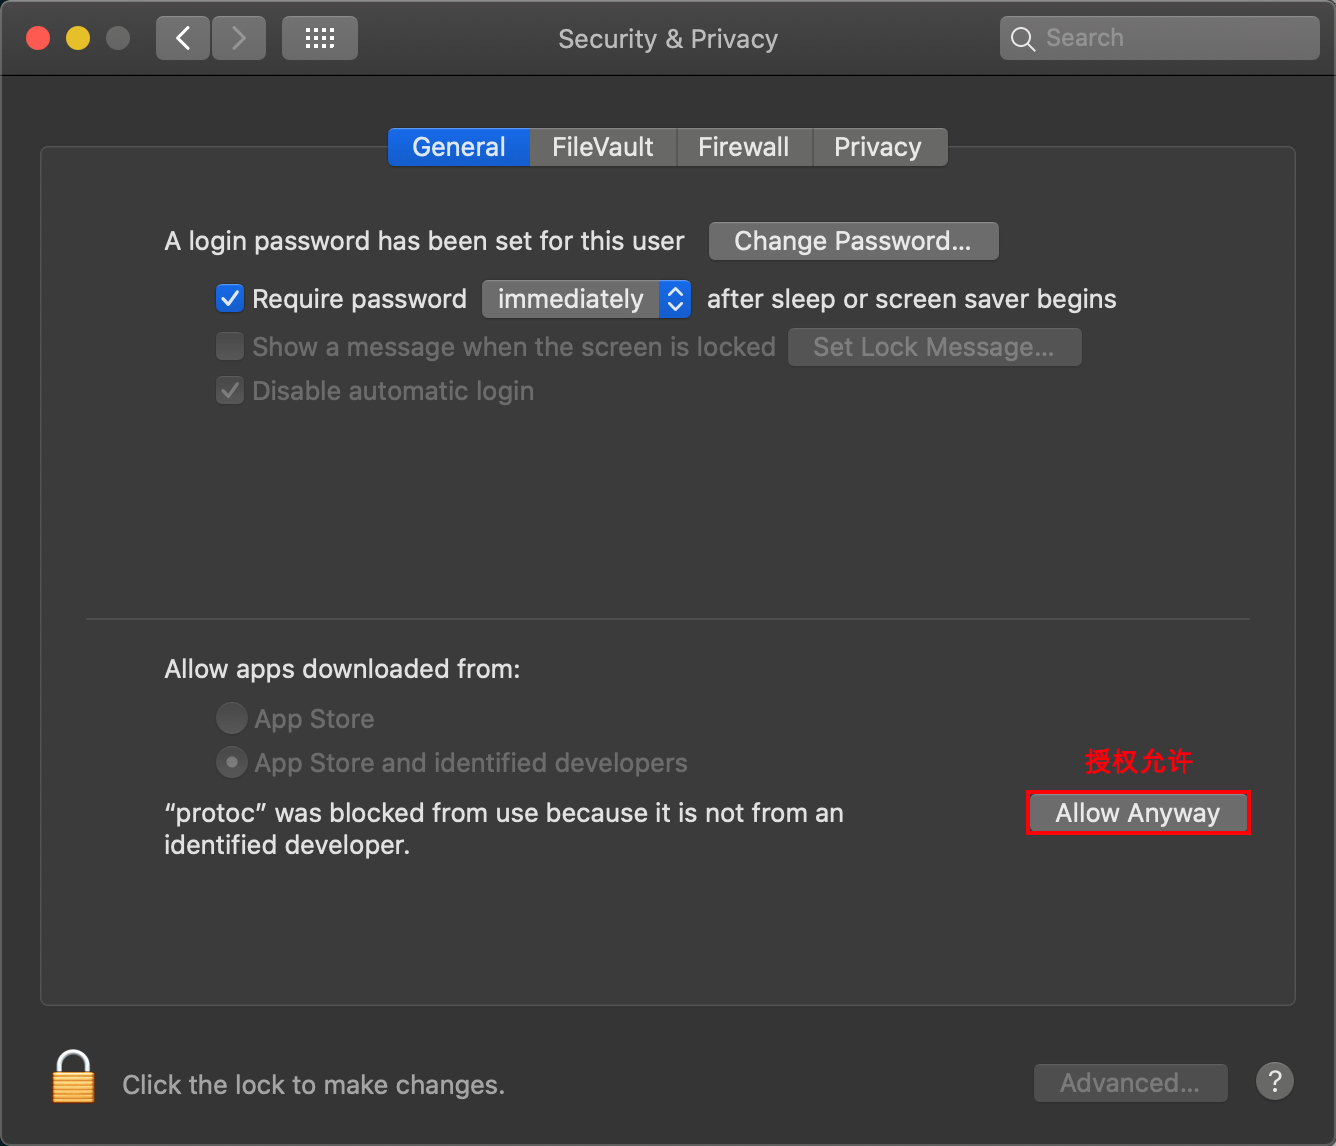
- 验证:在终端中执行
protoc -h命令